
Check Payment Mode
by: MageliaAdd check payment method for the Responsive Storefront
| Assistance: | Magelia |
| License: | View license |
-
This package implements a check payment mode in the Magelia WebStore Responsive Design Storefront. Orders placed with this payment mode will be created with a status 'New' and a payment with status 'pending' until the check has been received.
Main benefits :
- Offer a check Payment mode
- Easy implementation
- Simple processWhat’s included ?
- a package that makes the Check payment method available to the Responsive StorefrontWhat’s required ?

This package requires that your storefront be based on the responsive design template available here and that the checkout page has not been modified. -
-
When you install the Check Payment Mode package:
-
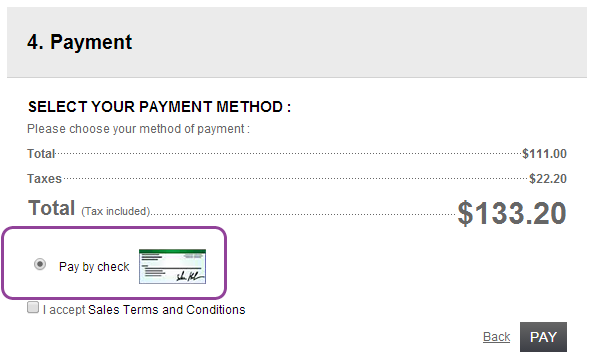
1. The new payment mode is available on the checkout page :

-
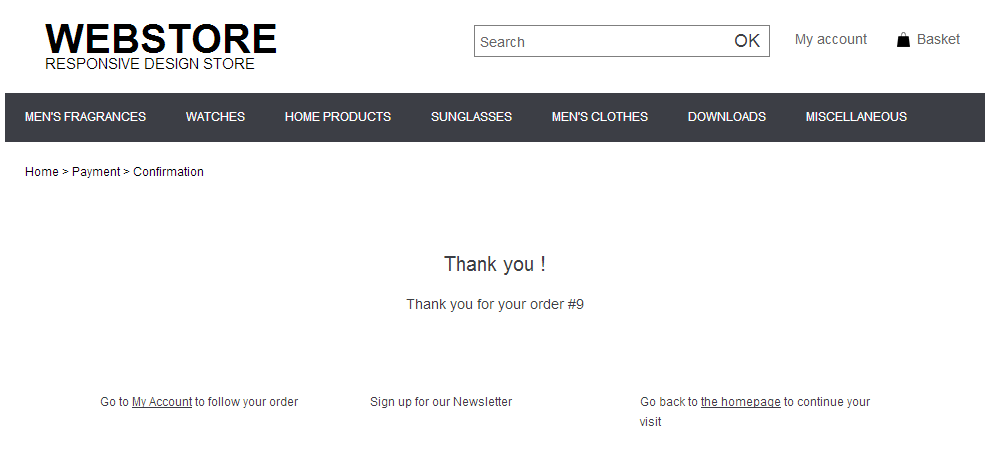
2. Order confirmation
If the users chooses the Pay by Check payment mode, the order is saved with a status New and the payment status is pending
-
3. Payment is associated with the order with a status pending
In the administration console you will see the pending payment appear on the "Payments" tab as shown below:

-
4. Payment received
Once the check has been received and approved, you simply have to manually update the order status and the payment status.
You may also want to add the check number as an additional information to the payment.
Additional Information and known limitations
- Multiple payment modes can be proposed in the Responsive design template. You may also propose additional payment gateways such as Authorize.Net or PayPal. Please view the others Payment gateways proposed by Magelia.
-
-
Installing packages for Magelia WebStore responsive Storefront is a two-step process.
- Configure Visual Studio to access your Magelia Private Repository
- View the packages you purchased or got for free
Please note that the configuration of your Magelia Private Repository has to be done only once. After you have configured it, all the packages that you add will be automatically available in your private repository.
-
1. Configure Visual Studio to access your Magelia Private Repository
If you have already configured your Magelia Private repository, skip this step and go directly to part 2.
We first need to get the URL of your private Magelia repository because we will need this URL to make the packages available in Visual Studio.
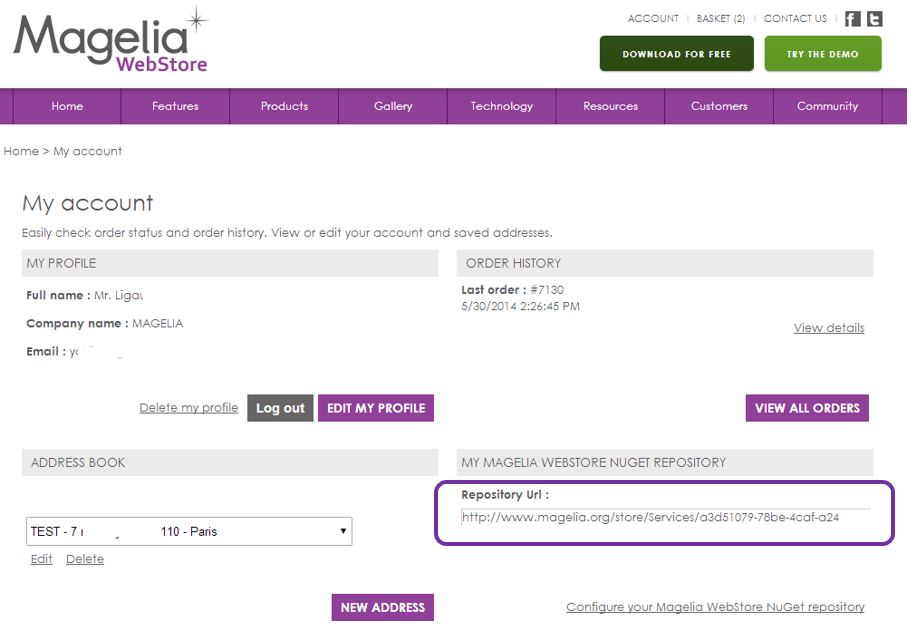
Go to www.magelia.org , login and access your account (www.magelia.org/store/en/account). The url of your private repository is on the lower right size of the page : Copy this URL
Now that we have retrieved this information, let us configure Visual Studio to access your packages.
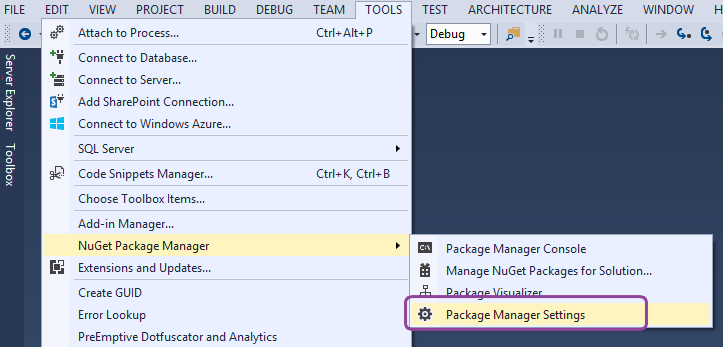
In Visual Studio, go to the menu: Tools > NuGet Package Manager > Package Manager Settings :
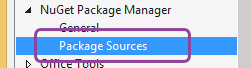
In the menu on the right click on "Package Sources"
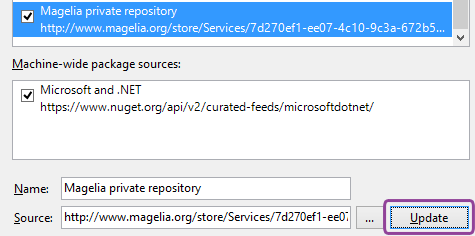
Then hit the « + » button on the upper right side to add a new package

Edit the name and enter "Magelia private repository"
Edit the source and Paste the URL of your Magelia repository (the one that was in your Magelia.org account)
-
2. View the packages you purchased or got for free
Once your private repository has been configured, simply click on “Update”. This will make the packages available in Visual Studio :
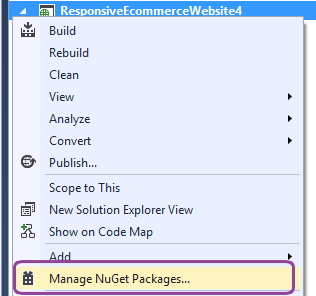
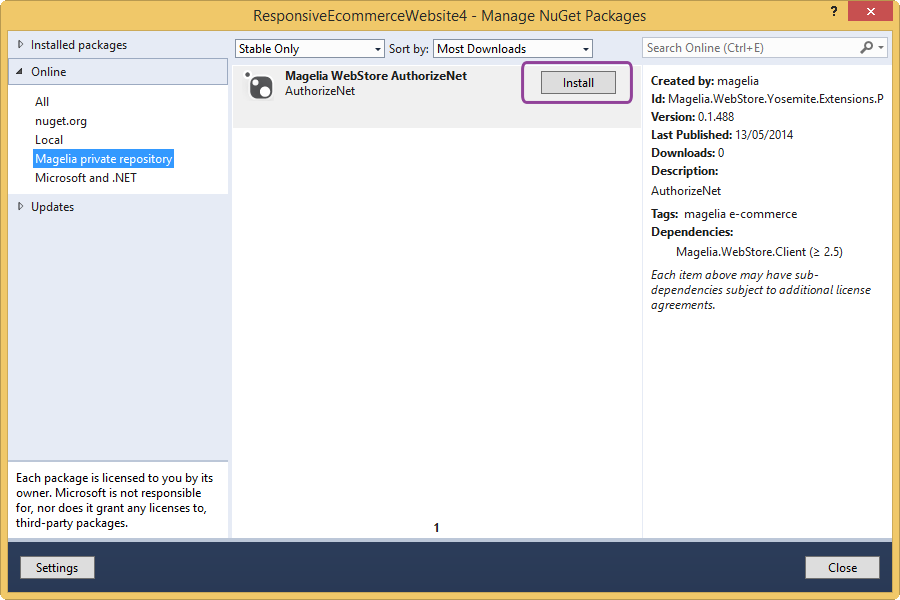
To view the available packages and install a package, right-click on your project or on the solution and select "Manage NuGet Packages" :
In the pop-up window select "Magelia private repository" on the left panel to view the packages that you obtained from the Magelia Gallery.
Click Install next to the package name to "Install a package"
You are all set!
What we have described here is the standard procedure to install a Magelia package.
In order to configure or adapt your package to your project requirements, please refer to the package page on Magelia.org.
-
-
Requirements
- Magelia WebStore (3.0+)
- A responsive storefront based on the Magelia Responsive design template (3.0+) available here
- The code of the checkout page must not have been deeply changed
Once the package has been installed from your Magelia private repository, the <payments> section in the Web.config file has been updated to add the parameter key associated with "Check" payment mode.
Example of information added to the Web.config file :
<payments>
<!-- Activating Check payment controller -->
<add controller="Check" />
</payments>
-
1. Test and check
Once you have properly deployed the package and modified the Web.config file, you should be able to see the Check payment mode in the checkout page.
-
-
-
-
Version 3.0 released May 2014
- Initial release
-
-
We also recommend:
-

Responsive StoreFront Free -
PayPal payment gateway $300.00 -
Authorize.Net DPM payment gateway $300.00